Editor: Crohy Head South | |
What would you like to do today? | |
| < | |
Crag Profile: Crohy Head South |
|||
Details of the crag can be reviewed below. Editing links are present on all routes and inter-route notes |
|||
|
|
|||
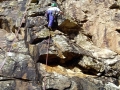
Directions: From Gweebarra bridge, heading North to Dungloe, turn left at Sweeneys shop, left again at chapel, out towards mast. Just short of mast fork right, northwards along the coast to a small jetty and roadend. Ten minutes walk futher on to the main crag. Take two maps, (this area is in between) if you think you might get lost! Climbs are described from beyond the Pinnacle Wall Area in the North West to the Main Crag in the South East (left to Right as you face the crags, with the sea behind you). NOTE these climbs can be affected by the tide and high seas. OS Grid Reference: B740060 Click here to view location in Google Maps |
|||
| Some 600M+ North of the Main Crag and 100M+ beyond Pinnacle Wall Area is a far bay with large cliffs, alas the cliff tops are rotten. The following route is on a small wall on the left-hand side of the bay. From 'Five Pints Ago' continue rightwards via a narrow walkway. Abseil down to access. |
|||
|
Edit note
Upload a new photo for this note |
|||
1 - That Dress
Length: 10m C McDevitt, H Boyle (24/7/94) The next bay has large cliffs with a rotten top. The following route is on a small wall on the left-hand side of the bay. From the top of Five Pints Ago, continue right via a narrow walkway. Abseil down.
That Dress. On the wall with a large boulder leaning against it. This takes the obvious groove on the right-hand side (facing the wail) of the wall.
View Route Edit Route Upload a new photo for this route | |||
| To the North West of Pinnacle Wall Area is an obvious slab extending for approximately 100M. This ends in a shallow bay, where the next climbs are to be found. Access via abseil. |
|||
|
Edit note
Upload a new photo for this note |
|||
2 - Five Pints Ago
Length: 15m H Boyle, C McDevitt (24/7/94) On the large slabby buttress to the west of this bay. Abseil directly down from a line of small pinnacles to a ledge. Climb short corner crack to a fabulous
flake/crack. Follow this to the two facing corners, take
the smaller left-hand corner to a ledge, climb thin crack on the slab to the top. An excellent route.
View Route Edit Route Upload a new photo for this route | |||
3 - Vision Master
Length: 20m S Brogan, H Boyle (1/4/94) Pinnacle Wall (West)
To the west of pinnacle wall is an obvious large slab which extends for approximately 100m. This ends in a shallow bay where the next climb is found.
Vision Master. This takes the right-hand side (facing the sea) of the prominent slab in the centre of the bay. Abseil to a ledge on the edge of the slab. Follow a line near the edge of the slab then trend rightwards.
View Route Edit Route Upload a new photo for this route | |||
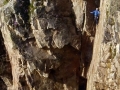
Pinnacle Wall Area 500M Northwards from the Main Crag, as the ground begins to rise towards an impressive headland, an impressive looking pinnacle can be seen. Pinnacle Wall is the North West facing steep wall of excellent black rock, to which the pinnacle is connected. Access is gained by heading towards and then past the top of Pinnacle Wall A descent ramp on the right can be downclimbed. When standing on top of the short final downclimb, 'Bungalow Blitz' is on your left and 'Dope on a Rope' is on your right. |
|||
|
Edit note
Upload a new photo for this note |
|||
4 - Johnny's Crack
Length: 14m J Sweeney, M Sweeney The wide crack on the left of the pinnacle (facing it). Climb the wide crack to a ledge on the ridge and follow this to the top and belay on summit. A good route for the grade. This route is on the pinnacle itself and starts from the ramp.
View Route Edit Route Upload a new photo for this route | |||
5 - Pinniclis
Length: 12m H Boyle (1/4/94) The thin crack up the centre of the pinnacle passing a ledge to summit. This route is on the pinnacle itself and starts from the ramp.
View Route Edit Route Upload a new photo for this route | |||
| The next routes are on the Pinnacle Wall, starting with 'Immram Brain' at the leftmost edge of the face. |
|||
|
Edit note
Upload a new photo for this note |
|||
6 - Immram Brain
*
 VS 5a
VS 5aLength: 20m H Boyle (1/9/94) This follows the curving left-hand arete of the wall. Start as for Fir Bolg for 3m to a good hand hold, swing across blank wall to reach a good side hold. Continue left to left trending flake and then climb thin cracks that follow the arete out over space. Well protected. View Route Edit Route Upload a new photo for this route | |||
7 - 'Black Pete' Crohy Head S.
 E1 5a
E1 5aLength: 17m P.Cooper & A.Tees 04/08/08 The wall between 'Fir Bolg' and Immram Brain', gear can be a bit spaced. Led on-sight. View Route Edit Route Upload a new photo for this route | |||
8 - Fir Bolg
 S -
S -Length: 16m H Boyle, M Sweeney (1/9/94) This takes the central crack up the wall. Start 3m left of Bungalow Blitz. Climb crack on good holds to a small corner to top.
)
View Route Edit Route Upload a new photo for this route | |||
9 - Bungalow Blitz
Length: 14m H Boyle, J Sweeney (1/9/93) Left-hand of Pinnacle Wall. Approx where the ramp ends, there is a small sloping ledge. Gain the ledge and move left to gain left trending cracks which are climbed to better holds to top. A good route.
View Route Edit Route Upload a new photo for this route | |||
| The next climbs are on your right/ seaward side. |
|||
|
Edit note
Upload a new photo for this note |
|||
10 - Dope on a Rope
Length: 10m H Boyle, J Sweeney M Sweeney (1/9/93) Start 1 m left of Chappy. Climb shield flake and directly to top on excellent holds.
View Route Edit Route Upload a new photo for this route | |||
11 - Chappy Days
 VD -
VD -Length: 10m H Boyle, J Sweeney, M Sweeney (1/9/93) Start on the wall to the right of the descent groove. Climb the rightward trending quartz ledges to the arete which is followed to the top.
View Route Edit Route Upload a new photo for this route | |||
12 - Pregzilla
Length: 10m H Boyle, J J Boyle (1/7/94) Starts on the ledge to the right of Chappy Days. Start near the right side of the wall, climb obvious line trending left to the top.
View Route Edit Route Upload a new photo for this route | |||
| The next routes are in a zawn 20M to the South, before you get to the Pinnacle Wall Area; it is easier to find them having first found the Pinnacle. |
|||
|
Edit note
Upload a new photo for this note |
|||
13 - Hal
Length: 10m H Boyle (1/9/93) In the same small zawn as "Route 1", this takes the fault running through the overhang on the west wall.
View Route Edit Route Upload a new photo for this route | |||
13a - Route 1
Length: 10m S Brogan (1/4/94) Pinnacle Wall Area
Continue past the main crag for approx 5OOm and as the ground begins to rise towards an impressive headland locate the most obvious feature "Pinnacle Wall" a North West facing black steep wall of excellent rock with a pinnacle attached to it. Access is by an easy groove and descent rightwards down ramp. Routes on this cliff are described facing the wall. But first there are two routes in the zawn you passed 20m back.
Route 1. This route takes a pillar on the east 5m from the back of the zawn. Climb pillar on good holds.
View Route Edit Route Upload a new photo for this route | |||
| About 100m back towards the Main Wall, from Pinnacle Wall Area, are 2 narrow zawns. Between the Zawns is an obvious white band of rock. Access via abseil. |
|||
|
Edit note
Upload a new photo for this note |
|||
14 - Leprous Lips
 VD
VD Length: 12m A.Tees, P.Cooper 4/08/08 About 100m back towards the main bay from Pinnacle Wall, are 2 narrow zawns. Between the Zawns is an obvious white band of rock. Abseil down the left side of this promontory to a yellow ledge at the lip of the left zawn (as you face the sea). Climb back up, overcoming an overhang, with an eroded lip, easily on big jugs. View Route Edit Route Upload a new photo for this route | |||
RED WALL AREA North of the Main Wall Area a rock tower with a reddish coloured seaward face can be found. Routes are left to right. |
|||
|
Edit note
Upload a new photo for this note |
|||
15 - Ripple .
Length: 15m I Rea, M Rea (28/3/89) The arete left of Sunshine Corner, starting at it's base, beginning gymnastically over a bulge but easing off with a left-trending finish at the top. Stake belay in situ.
View Route Edit Route Upload a new photo for this route | |||
16 - Sunshine Corner
*
VD -Length: 15m A McKinstry, P Mangkin Route follows the obvious deep corner to the left of Retreat. Move right at the top to avoid some loose rock View Route Edit Route Upload a new photo for this route | |||
16a - Muscles to Start
Length: 12m First ascensionists unknown Start 3m right of Sunshine Corner at a slight bulge follow the crack that trends left to the top. View Route Edit Route Upload a new photo for this route | |||
17 - Retreat
Length: 15m A McKinstry One of the many variations possible up wall left of Red Wall. This one follows an obvious corner line about 4m left.
View Route Edit Route Upload a new photo for this route | |||
18 - Red Wall
*
S -Length: 12m M Field, M Oakley Left of the slab is a dark overhanging corner, with some possibilities, and left again a tower of rock with a reddish coloured seaward face.
Route climbs the obvious line up the front of the tower. View Route Edit Route Upload a new photo for this route | |||
| North Side of Main Crag, beyond descent steps and left of the cave is a long steep wall. Around the seaward side of this is a huge easy angled slab, with a dirty corner at its left-hand side. The next two routes are on this slab and many variations are possible. |
|||
|
Edit note
Upload a new photo for this note |
|||
19 - Rambler
Length: 24m Unknown Follow a line up the left-hand side of the slabs about 5m out from the left-hand corner. View Route Edit Route Upload a new photo for this route | |||
20 - Rockhopper
Length: 23m not known Left of the cave is a long steep wall. Around the seaward side of this is a huge easy angled slab, with a dirty corner at its left-hand side. The next two routes are on this slab and many variations are possible.
Rockhopper. Up broken rock at the right-hand side to gain edge of slab. Follow right-hand side of slab to the top.
View Route Edit Route Upload a new photo for this route | |||
You've made it back to the Main Crag Area, congratulations! The next routes are described from left to right looking at the crag and start with 'Norman's Myth' which is to the left of the descent steps. |
|||
|
Edit note
Upload a new photo for this note |
|||
21 - Norman's Myth
Length: 15m A Saunders, N Smyth (13/2/77) HVS+A1. Start: The overhanging crack/corner left of the cave, using aid to get over the roof.
View Route Edit Route Upload a new photo for this route | |||
22 - Jaws
Length: 10m D Howard, N Parker Jaws Start: On the left-hand side of the short wall below the descent steps. Up left-hand side of the wall. Move left across lowest edge of the cave lip to impending wall. Continue to traverse left, then up to the top. View Route Edit Route Upload a new photo for this route | |||
23 - The Gourmet
 S 4a
S 4aLength: 18m D Howard, H Williamson Start: At the foot of the descent steps, about 2m right of the quartz vein. Climb easily up below the roof to the niche. Climb up right-hand side of roof and slabs to the top.
View Route Edit Route Upload a new photo for this route | |||
24 - Sponges
Length: 18m D Stelfox, W Brown-Kerr (28/7/84) Start: As for The Gourmet. Move right after 2m, up the left side of the undercut nose of rock to the right. Gain the nose and climb the wall above to the top. View Route Edit Route Upload a new photo for this route | |||
25 - Wino
Length: 18m J Kerr, L Marshall (4/76) Start: About 4m right of The Gourmet, right of the undercut nose. Follow a broad groove/crackline with the option of finishing on the left or straight up. View Route Edit Route Upload a new photo for this route | |||
26 - Passion
 VD -
VD -Length: 18m M Field and Party Start: At the foot of the slabby wall, capped by an overhang, to the right of Wino. Climb the wall moving right under the roof to finish up a ramp on the right of the roof.
View Route Edit Route Upload a new photo for this route | |||
27 - Endless Cycle
*
HS 4bLength: 18m I Rea, M Rea (1/10/89) Start on the large boulder 3m right of Passion and directly below a large jutting roof. Climb up and turn the roof on the left. Go directly up and where Passion goes right, go left under the juggy block, and finish up a superb juggy overhang.
View Route Edit Route Upload a new photo for this route | |||
28 - Bugs
Length: 15m A McQuoid, R Armstrong (1976) Route follows the left-hand crack of the wall, with the crux at the second overlap.
View Route Edit Route Upload a new photo for this route | |||
29 - Out of Touch
Length: 15m I Rea, M Rea (1/10/89) Start 1.5m left of Bugs. Climb straight up to a double stepped roof. Turn this on the right on small holds and undercuts, and go up slightly left under another roof. Make a long step and reach left to turn this and finish straight up.
View Route Edit Route Upload a new photo for this route | |||
30 - Ghostie
Length: 18m M Oakley, M Field The route follows the right-hand of the two cracks View Route Edit Route Upload a new photo for this route | |||
31 - McKinstry's Crack
*
VS 4cLength: 18m A McKinstry, P McGuckin (4/76) (HS +A1) D Stelfox (First free ascent) (9/3/85) Start: The route follows the obvious corner bounded on the right by a smooth black wall. Follow the corner through two overlaps to the top. Climbing is sustained throughout but protection is excellent. Crux is first overlap.
View Route Edit Route Upload a new photo for this route | |||
32 - Littoral manoeuvres
 E2 5b
E2 5bLength: 18m P.Cooper & A.Tees 04/08/08 A steep and sustained line on the large face between 'McKinstry's Crack' and 'Rainman', it has a definite crux in the lower part but interest never wains. A good clean line for which I'd suggest giving nothing less than a star and quite possibly worth two. View Route Edit Route Upload a new photo for this route | |||
33 - Rainman
*
*
E1 5bLength: 18m I Rea, M Rea (28/3/89) At the foot of the arete, right of McKinstry's Crack pull up right onto a slab. Up this onto an orange niche.
Step out left and climb the black wall and arete to the top.
View Route Edit Route Upload a new photo for this route | |||
34 - Lotus Blossom
Length: 20m I Rea, M Rea (28/3/89) Start in the alcove down and immediately right of Rainman. Layback up and continue over a series of bulges. The crux is moving right at the biggest bulge. Finish trending right.
View Route Edit Route Upload a new photo for this route | |||
35 - My Fair Lady
 HS 4b
HS 4bLength: 20m A McKinstry (4/76) My Fair Lady 20m HS.4b Start: Right of McKinstry's Crack is a broad buttress curving round to form a corner at the back wall of the cove (Space Walker). Approximately in the centre of the buttress is a groove crackline with a bulge at half height. Rather dirty towards the top.
View Route Edit Route Upload a new photo for this route | |||
36 - Maggie's Last Munro
Length: 12m Alan & Andrew Tees 15/04/04 One metre right of "My Fair Lady" smear up to reach a rough rib,continue on poorish gear to a large block,and finish (probably) as for the above. View Route Edit Route Upload a new photo for this route | |||
37 - Quiet Earth
Length: 20m I Rea, M Rea (1/10/89) Start 3m left of Space Walker below a small roof a metre or so above the ground. Go over the roof and climb a left-facing groove to a roof. Undercut rightwards for 1.5m and pull over a roof to gain a good resting spot on a foothold and projecting block. Climb delicately leftwards across a slab and finish up the left arete.
View Route Edit Route Upload a new photo for this route | |||
38 - Space Walker
*
*
 VS 4c
VS 4cLength: 25m A McKinstry (9/76)FFA Martin & Mark McGuigan, 05/04 VS + A1
Start: The obvious broad corner at the junction between the last buttress and the rotten back wall. Often wet as it is a natural drainage line. 4 points of aid used on the first ascent. Again the route is rather dirty towards the top.
View Route Edit Route Upload a new photo for this route | |||
